DIY gift ideas homemade handmade presents inspriatoin thrifty save money

30 DIY gift ideas

Making & DIY, Sustainability, Thrifty

Christmas is coming, which can be an expensive time of year. Just because it is the season to spend, doesn’t mean you have to! Why not have a go at these thrifty, homemade, DIY gift ideas and save money whilst creating something beautiful.

If the slideshow above is not displaying correctly for you, you can visit it directly here: 30 DIY Gift Ideas slideshow

Enjoy clicking through the 30 DIY gift ideas in the slide show above, for some homemade gift inspiration.

Why make DIY gifts?

Making your own DIY gifts can be a fun and creative project. There is something quite satisfactory about making something yourself. Not only is it good for saving money, it’s also great for your self-esteem! So, go on, have a go!

Repurposing materials that you already have, will save you from buying something new. If we can make what we need, out of what we already have lying around.. we have another way to help the environment by living sustainably.

Getting into a thrifty mindset, it is a good idea to make and prepare DIY Gifts all year round. Why not create a little stockpile of beautifully-made, special presents – ready to give to your loved ones, family and friends.

DIY gift ideas christmas chutney yummy tomato apple diy home made gift gifts thrifty sustainability making relish

Homemade Christmas chutney

Making your own gifts can also save you a small fortune at Christmas. Because of advertising and media pressure, we can get swept up in the commercialism of Christmas and of gift-giving. It’s easy to believe that the more you spend on a present, the more the recipient will feel loved. The truth is, the more thought and time you put into a present, the more your friends and family will KNOW they are loved.

Why not have a go at making some of the DIY gift ideas, in the slide show above, this year. You will probably decide to make homemade presents every year, once you realise how enjoyable it can be. A friend might like to join you for a gift-making evening or perhaps a family craft day might be fun.

Finally, some of the DIY gift ideas show recipes and how-to guides, that have been featured in previous blog articles. Below you will find links to those related articles.

Making and DIY gift ideas:

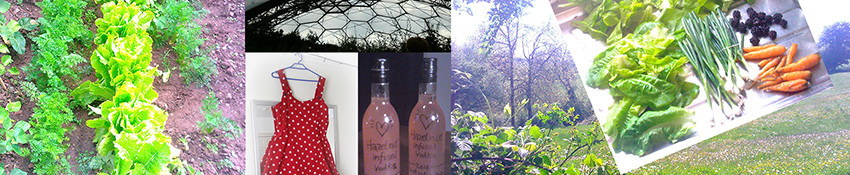
Sloe Gin, Toffee Vodka, Tomato & Apple Chutney, Caramalised red onion & chilli chutneyDandelion Jam, 3D embellished glass jars, Upcycle inspiration & ideas


Enjoy making beautiful homemade gifts this year and please do post any DIY gift ideas that you have in the comments section below.

 
A few self-sufficient, thrifty or off-the-grid selections, including Solar Panel Chargers. Toys and tools that I’m saving up for!

 
If you would like to receive Thrifty Sustainability updates by email when a new article is added, please subscribe here:


chutney recipe jars of caramelised red onion and chilli chutney homemade gift idea

Make it: Caramelised red onion & chilli chutney

Making & DIY, Thrifty

Caramelised red onion and chilli chutney is a great recipe to make this autumn. Once the chutney is sealed in the jars, it will have time to mature to be extra delicious just in time for Christmas.chutney recipe jars of caramelised red onion and chilli chutney homemade gift idea

Getting into a thrifty mindset, it is a great idea to make and prepare DIY Gifts all year round. Have a little stockpile of beautifully-made, special presents, ready to give to your loved ones, family and friends. Making your own gifts can also save you a small fortune at Christmas. It’s easy to believe that the more you spend on a present, the more the recipient will feel loved. The truth is, the more thought and time you put into a present, the more the recipient will KNOW they are loved.

With this gift idea you can put even more thought into the design by personalising and decorating the labels that you stick on each jar.

You will need:

First off you will need clean, sterilised, glass jars with lids. You can shop around kitchen stores or supermarkets during the sales to find cheap, empty jam and preserve jars. You could save even more money by recycling your empty jam and chutney jars.

To recycle your own jars, ensure you wash each jar and lid thoroughly. Then, when you have a good stash, sterilise in bulk, all the jars and lids using sterilising solution. You can buy a pot of sterilising powder for under £2 which will make a few batches of sterilising solution. Available from anywhere that sells home-brewing equipment, or on Amazon – VWP Cleanser and sterilser – 100g


Caramelised red onion & chilli chutney recipe:

(this makes about 3 jars so just double up if you’d like to make more)

Ingredients

10/11 red onions (peeled)chutney recipe caramelised red onion chilli chutney homemade gift
1 red chilli  (de-seeded) or 1 tsp of dried chilli flakes
3 bay leaves
25ml olive oil
350g dark muscovado sugar or dark brown sugar
100ml balsamic vinegar
100ml red wine vinegar
2tsp ground ginger
A good sprinkle of salt and pepper

Method
  1. Cut onions and chilli into short strips and place into a large, heavy-based saucepan with the olive oil and bay leaves. Cook on a low heat for 20 mins, stirring occasionally until the onions are darker.
  2. Next, stir in the sugar, both vinegars, ginger, salt and pepper.
  3. Cook on a medium-high heat for about an hour, stirring occasionally, until the mixture is very thick, dark and sticky. You can check if the chutney is ready by taking half a teaspoon of the mixture and popping it in the fridge for 5 mins to see if it is thicker when cool.
  4. Once ready, remove saucepan from heat and take out the bay leaves.
  5. Spoon the chutney, whilst still a little warm, into the sterilised jars. At this stage you can add a piece of cling film over the top of the chutney if you like, to help it to keep for longer.
  6. Finally, seal the jars tightly with their lids and add your own labels. The chutney will mature and the flavours will deepen if you can leave it sealed in the jar for a month or two before opening and enjoying.

You can leave the chutney, sealed in its jar, for a year or two in a cool dark store cupboard – it will still be safe to eat. Once opened, keep refrigerated and the chutney will be fine to eat for a good few months… if it lasts that long!

How to thicken runny chutney

Making chutney is not an exact science and sometimes it can take ages to thicken. The runnyness is due to how much liquid is in the onions that you used and there is nothing you can do other than wait it out.

As you simmer your mixture, the liquid evaporating is what makes the chutney thicker, so keep it simmering and eventually it will thicken.

If you would like to speed up the process, transfer your mixture to a couple of wide-based pans – an increased surface area of the mixture will allow for more evaporation.

Decorating your jars of yummy chutney

There are lots of ways to make the label that you put on your chutney special…

  • You could personalise each jar by writing the name of the recipient
  • You could draw a picture of the ingredients on the label
  • You could write serving suggestions, such as: Great with Sausages, Cheese and in Christmas Sandwiches!
  • You could add the date that the chutney was made
  • You could add 3D embellishing paste to the jars as in this previous article: Make it: DIY gift ideas – 3D embellished glass jars
  • You could add stickers, glitter, whatever… get creative!
If you’re a complete chutney nut, you can, of course, keep the whole batch for yourself and scoff the lot! Enjoy!

 
A few self-sufficient, thrifty or off-the-grid selections, including Solar Panel Chargers. Toys and tools that I’m saving up for!

 
If you would like to receive Thrifty Sustainability updates by email when a new article is added, please subscribe here:


christmas chutney yummy tomato apple diy home made gift gifts thrifty sustainability making relish

Make it for Christmas: Tomato & Apple Chutney

Making & DIY, Thrifty

Tomato & Apple Chutney is a great recipe to have a go at in October/early November as the fruits are in season and once the chutney is sealed in the jars, it will have time to mature to be extra-delicious just in time for Christmas.

tomatoes tomato apple chutney chutny pickle pickles home made preserve thrifty sustainability cheap foodGetting into a thrifty mindset, it is a good idea to make and prepare DIY Gifts all year round so that you have a little stockpile of beautifully-made, special presents – ready to give to your loved ones, family and friends. Making your own gifts can also save you a small fortune at Christmas. If you get swept up in the commercialism of Christmas and of gift-giving, it’s easy to believe that the more you spend on a present, the more the recipient will feel loved. The truth is, the more thought and time you put into a present, the more the recipient will KNOW they are loved.

With this gift idea you can put even more thought into the design by personalising and decorating the labels that you stick on each jar.

Making your own gifts can save you a small fortune at Christmas!

You will need:

First off you will need clean, sterilised, glass jars with lids. You can shop around kitchen stores or supermarkets during the sales to find cheap, empty jam and preserve jars, or you can save even more money by recycling your empty jam and chutney jars.

To recycle your own jars, ensure you wash each jar and lid thoroughly then when you have a good stash, sterilise in bulk, all the jars and lids using sterilising solution. You can buy a pot of sterilising powder for under £2 which will make a few batches of sterilising solution – available from anywhere that sells home-brewing equipment, or here is one from Amazon – VWP Cleanser and sterilser – 100g


Tomato & Apple Chutney Recipe:

(Makes about 6 jars)

Ingredients

  • christmas chutney tomato apple diy home made gift gifts thrifty sustainability making relish450g (1lb) Apples – finely chopped (do not use the core)
  • 450g (1lb) Onions – finely chopped (do not use the peel/skin)
  • 1kg ( 2lb 3oz) Firm, ripe tomatoes – finely chopped
  • 300g (10 ½ oz) Sultanas
  • 450ml (16 fl oz) Vinegar
  • 350g Brown Sugar
  • 1tsp Ground Ginger
  • 1tsp Cinnamon
  • 1tsp Nutmeg
  • Salt and Pepper to taste

Method

christmas chutney tomato apple diy home made gift gifts thrifty sustainability making relish make

  1. Put all of the ingredients apart from the sultanas, sugar, salt and pepper into a large, heavy-based saucepan – there is no need to add cooking oil. Bring the ingredients to a boil, then reduce the heat to simmer for 30 mins, stirring occasionally until the mixture is thicker
  2. Remove saucepan from heat and stir in the sugar, sultanas, salt and pepper
  3. Put saucepan back on a low heat, increase heat to bring the mixture back to a simmer and simmer for a further 30 mins – 2hrs until the mixture is very thick
  4. Remove saucepan from heat and spoon, whilst still warm, into the sterilised jars. Seal the jars and add your own labels – you can add a square of clingfilm across the top of the chutney before you screw on the lid if you wish to help it to keep longer

Storing the chutney

The chutney will mature and the flavours will deepen if you can leave it sealed in the jar for a month or two before opening and enjoying. You can leave the chutney, sealed in its jar, for a year or two in a cool dark store cupboard – it will still be safe to eat. Once opened, keep refrigerated and the chutney will be fine to eat for a good few months… if it lasts that long!

How to thicken runny chutney

Making chutney is not an exact science and sometimes it can take ages to thicken. The runnyness is due to how much liquid was in the fruit that you used and there is nothing you can do other than wait it out.

As you simmer your mixture, the liquid from the fruit evaporating is what makes the chutney thicker, so keep it simmering and eventually it will thicken.

If you would like to speed up the process, transfer your mixture to a couple of wide-based pans – an increased surface area of the mixture will allow for more evaporation.

christmas chutney yummy tomato apple diy home made gift gifts thrifty sustainability making relishDecorating your jars of yummy chutney

There are lots of ways to make the label that you put on your chutney special…

  • You could personalise each jar by writing the name of the recipient
  • You could draw a picture of the ingredients on the label
  • You could write serving suggestions, such as: Great with Sausages, Cheese and in Christmas Sandwiches!
  • You could add the date that the chutney was made
  • You could add stickers, glitter, whatever… get creative!


If you’re a complete chutney nut, you can, of course, keep the whole batch for yourself and scoff the lot! Enjoy!
 
A few self-sufficient, thrifty or off-the-grid selections, including Solar Panel Chargers. Toys and tools that I’m saving up for!

 
If you would like to receive Thrifty Sustainability updates by email when a new article is added, please subscribe here:


diy gift christmas idea glass jar decorate decoration embelish embelishment design present pebeo paste 3d creative project

Make it: DIY Gift Ideas – 3D embellished glass jars

Making & DIY

Getting into a thrifty mindset, it is a great idea to make and prepare DIY Gifts all year round so that you have a little stockpile of beautifully home-made, special presents – ready to give to your loved ones, family and friends. Making your own gifts can also save you a small fortune at Christmas. Have you ever received a DIY gift? How did it make you feel?

If you get swept up in the commercialism of Christmas and of gift-giving, it’s easy to believe that the more you spend on a present, the more the recipient will feel loved. The truth is that the more thought and time you put into a present, the more the recipient will KNOW that they are loved and that you consider them worth the effort, of making something especially for them. With this DIY gift idea you can put even more thought into the design by personalising the jar with the name of the person that you are giving it to.

diy gift christmas idea glass jar decorate decoration embelish embelishment design present pebeo gold relief paste creamYou will need:

First off you will need clean, dry, glass jars. You can shop around kitchen stores or supermarkets during the sales to find cheaper mason and storage jars, or you can save even more money by recycling your empty coffee jars or by using any glass object that you care to decorate, such as wine glasses or recycled jam jars.

You will also need a tube of 3D paste – For this example ‘Pebeo glass & metal paint relief paste outliner‘ has been used as they have a very effective metallic gold paste, which is fitting if you are considering making Christmas presents. If you shop around online using sites like Amazon and Ebay, you can find a tube for about £3 – a small tube will last you for a lot of projects, as a little goes a long way.


How to make 3D embellished glass jars:

This is the easy and fun bit! Hold your jar steadily in one hand and use the tube of relief paste to carefully doodle and swirl your design onto the glass. You don’t have to be a great artist here, less is more so here are some suggestions:

  • the recipient’s name
  • a simple heart shape
  • easy to draw geometric shapes like squares and rectangles – dotted around the jar
  • a spiral
  • a sunshine or stars
  • an outline of a spoon and the word sugar / coffee / tea
  • the word sweets / biscuits / treats
  • an outline of a cat or dog or the word miaow or woof
  • an outline of a leaf or tree

diy gift christmas idea glass jar decorate decoration embelish embelishment design present pebeo paste 3d creative projectJust use your imagination when drawing out your design and remember, that it is the thought that counts with this DIY gift, and whatever you create it will be wonderful for the recipient, because you made it for them.
Once you’ve added your design to the jar, you must now leave the jar to dry in a safe, out of the way, dry place for at least half a day, to ensure that your design sets solid.

Once dry you will notice that you can run your fingers over the design and it has created a 3D effect on the jar. It looks really interesting and as is pretty durable too, so your design will endure a few knocks and bumps and last for years.

If you want to get really creative, why not take things further by experimenting with glass paints too!

The finished jars are beautiful as they are and you can always fill them for an extra surprise.

Here are a few ideas of what you could pop inside:

  • Sweets
  • Biscuits
  • Small party-favour toys and games
  • tubes of glitter / googly eyes / beads / sequins and other crafting items
  • a rolled up message on a piece of coloured paper, that you have written especially for them
  • a rolled up tie or pair of colourful socks
  • Small make-up items and bottles of nail varnish
  • tea bags / coffee / sugar
  • Dried fruit / nuts
  • herbs and spices
  • a candle

You could fill your jar with anything you like, or leave it looking empty and elegant, it’s totally up to you as it’s your creative project. You can’t go wrong and your DIY gift will make someone’s day because you have made it for them yourself!

Enjoy… and if you have any design tips or ideas for filling the jars – let us know in the comments below – thank you!
 
A few self-sufficient, thrifty or off-the-grid selections, including Solar Panel Chargers. Toys and tools that I’m saving up for!

 
If you would like to receive Thrifty Sustainability updates by email when a new article is added, please subscribe here:


how to make sloe gin sloes blackthorn home brew diy gifts alcohol bottle present home made sloe gin

Make it: Sloe Gin

Making & DIY, Thrifty

Making Sloe Gin is one of the most rewarding pastimes in September/October.

how to make sloe gin sloes blackthorn home brew diy gifts alcohol bottle present home made sloe gin

Freshly picked sloes

Scroll down for a delicious sloe gin recipe. If you are lucky, and there is an early crop of Sloes, you will have time to make lots of little gift-sized bottles of home-made sloe gin, to give away to friends and family at Christmas… Won’t you be popular this year!

Giving home-made DIY gifts is a great way for you to save money and over the years the savings will add up. Your friends and family will appreciate something that has been made for them by you, everyone who receives something will feel special, and worth your time and effort, and that is a gift in itself.

Of course there is always the option of getting your Grinch on and keeping the lot for yourself.. no one would blame you, as Sloe Gin is purply-red, bottled bliss. One sip spreads a lovely warming glow through your chest, which makes it the perfect accompaniment to cosy winter nights snuggled up on the sofa.

sloe berries berry how to make sloe gin sloes blackthorn home brew diy gifts alcohol bottle present home made sloe gin liqour

Sloe berries – fruit of the Blackthorn

Where to find Sloes

Sloes are the berries of the blackthorn bush, sloes grow in hedgerows all over the UK as a shrub or small tree.

The autumn fruits appear blue at first then they have a slightly cloudy sheen, then turn shiny black. Ready to pick in September/October.

It is best to pick sloes after the first frost, but if you can’t wait that long and there has been an early crop of sloes, simply pop them in the freezer for a few hours before you make your gin.

Just a little warning, don’t try to eat the sloes when you pick them, the fruits are very sharp and tart and not at all tasty. Best to make gin out of them.


How to make Sloe Gin

Ingredients:

  • Sloes
  • Sugar (granulated white sugar or caster sugar is best)
  • Gin (shop around to find supermarket cheapest deals or own brand)

Before you start you will need a large, sterilised bottle, jar or demijohn – something that can be sealed (even if you seal it with clingfilm). You could even use the bottles that the gin came in.

how to make sloe gin sloes blackthorn home brew diy gifts alcohol bottle present home made sloe gin liqour

Sloe berries – ready to be washed and pricked!

Preparing the Sloes

Once you have picked your Sloes, wash them to remove any dirt, then place in a bowl. Now comes the fun part… prick small holes in each Sloe. You can do this by daintily taking each sloe and piercing its skin with a sewing needle… or you can get a fork and stab up a bowl of them in a hit and miss, let’s get this done stylee. Either way will work. The idea is that by piercing the skin, the juices will be able to flow into the gin and make a much richer tasting and more beautifully coloured drink.

Making the Gin

  1. Fill a third of your jar, bottle or demijohn with your freshly-pricked sloes
  2. Add sugar, it will fill the gaps between the sloes, up to about the level of the top of the sloes
  3. Pour in Gin to cover the sloes and sugar, up to the top of your bottle, glass or demijohn – If you like, you can add complimentary flavours at this point, such as a cinnamon stick or a few drops of almond or vanilla essence
  4. Seal the jar, bottle or demijohn and give your brew a few swishes to shake the mixture and start the process
  5. Place your Sloe gin in a dark, cool cupboard and give it a few swishes every day for two or three weeks and then you can leave it to stand. The mixture will continue to deepen in colour and flavour and you can leave it for three or four months
  6. After the process is complete your mixture will be a beautiful, rich, purply-red colour. Pour this liquid through a sieve (or a square of muslin) into a measuring jug, and from the jug pour into sterilised screw-cap bottles and seal up, they are now ready to give as gifts. Or… pour the sloe gin into a glass and have some immediately… yum yum!

Once sealed in screw-cap bottles the slow gin will keep for years.. but good luck with that, most will be gone by the new year!

Make use of the leftovers

If you don’t want to waste the gin and sugar soaked sloes that are left over at the end of the process… try eating a couple.. or pour vodka or sherry over them, this time don’t add any sugar, seal up the bottle and swish the mix occasionally over a couple of weeks to make a cheeky sloe vodka or sloe sherry –

how to make sloe gin sloes home brew diy gifts alcohol bottle present home made sloe gin

You can give small bottles of sloe gin as gifts

it won’t have as rich a colour as your first batch of sloe gin, but it’s a great way of adding value to a cheap bottle of vodka or sherry.

Experiment & get creative

You can experiment with the amount of sugar you use each year and with different types of alcohol if you are not a gin fan, there is no set rule when making sloe gin and there are plenty of different recipes out there if you fancy doing a little research.

Get creative if you are making little bottles of sloe gin as gifts, maybe tie a ribbon around the neck or decorate the label with glitter, or perhaps tie a parcel label around the neck and write ‘Drink Me’ on it.

Enjoy, drink responsibly and get used to being incredibly popular – this will tend to happen if you give bottles of home-made alcohol as gifts!
 
A few self-sufficient, thrifty or off-the-grid selections, including Solar Panel Chargers. Toys and tools that I’m saving up for!

 
If you would like to receive Thrifty Sustainability updates by email when a new article is added, please subscribe here: